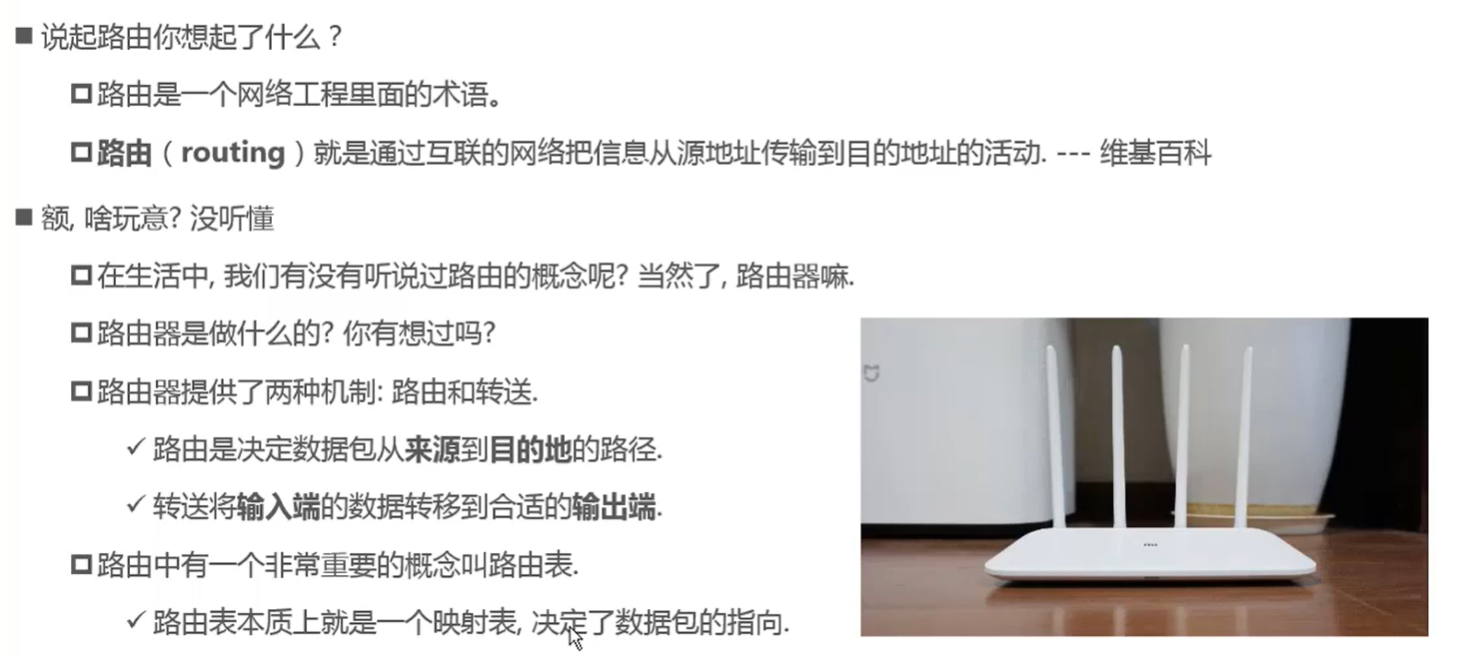
什么是路由

阶段
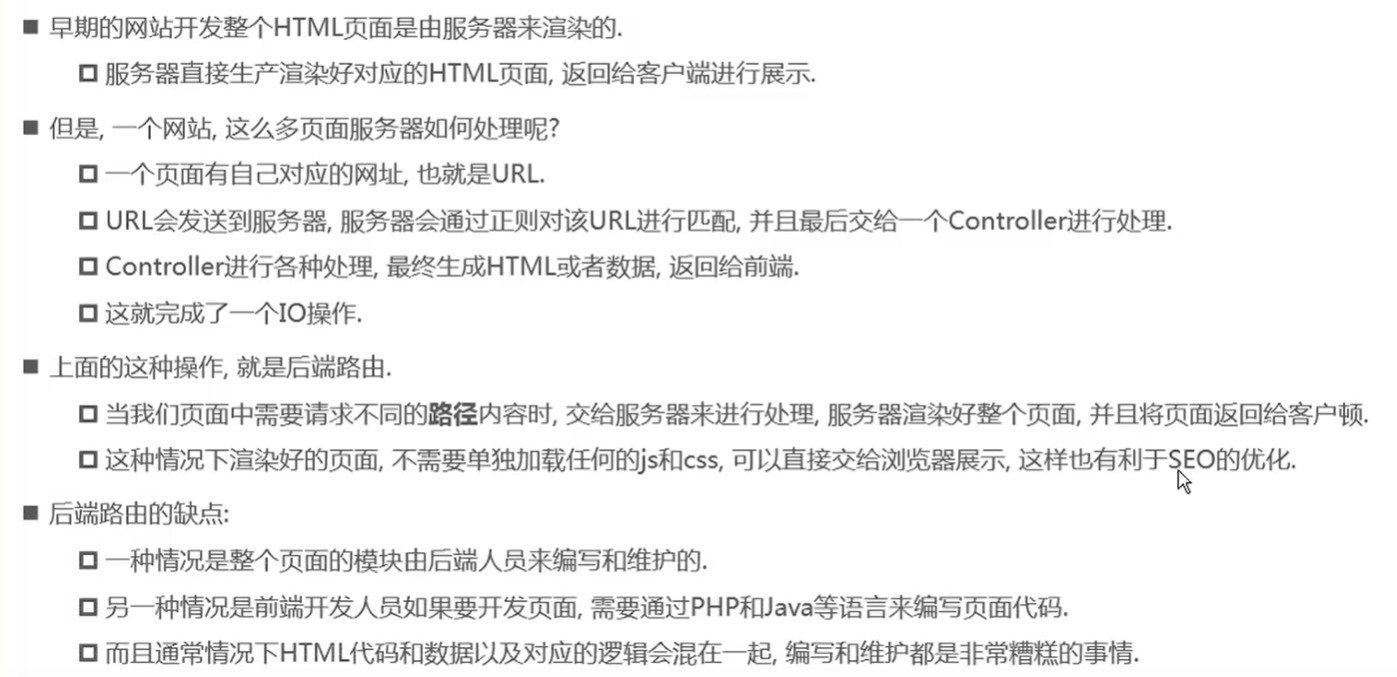
后端路由阶段
前端路由阶段
改变URL页面不刷新
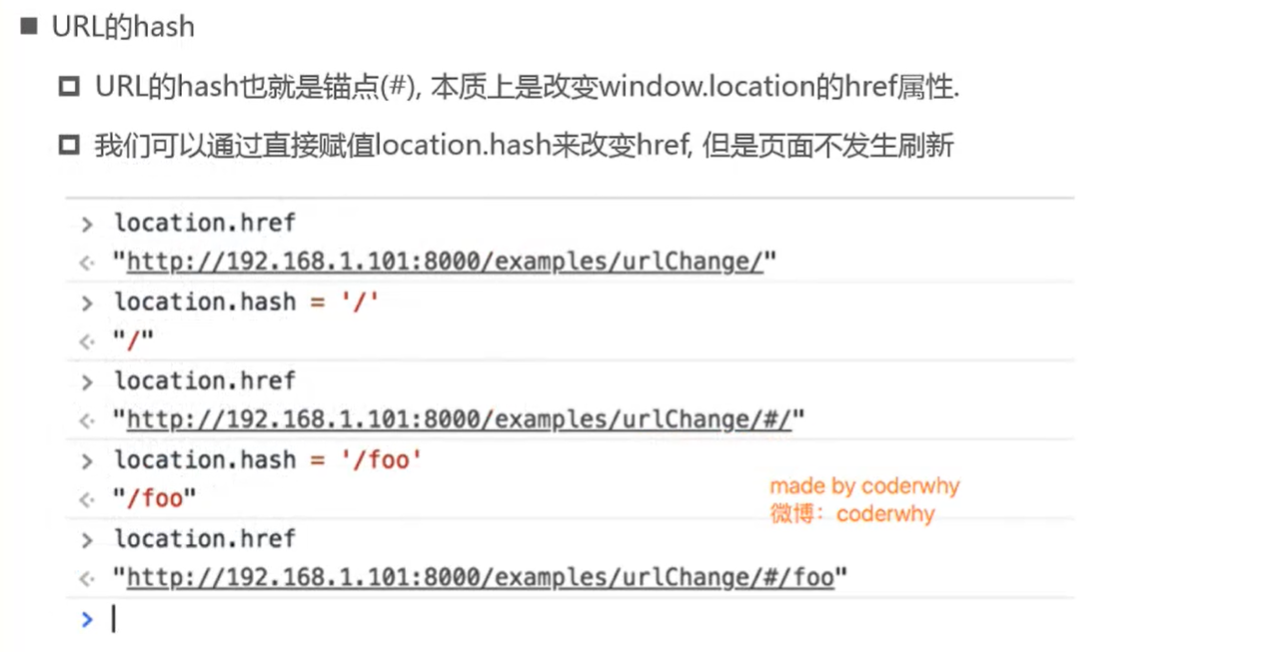
URL的hash
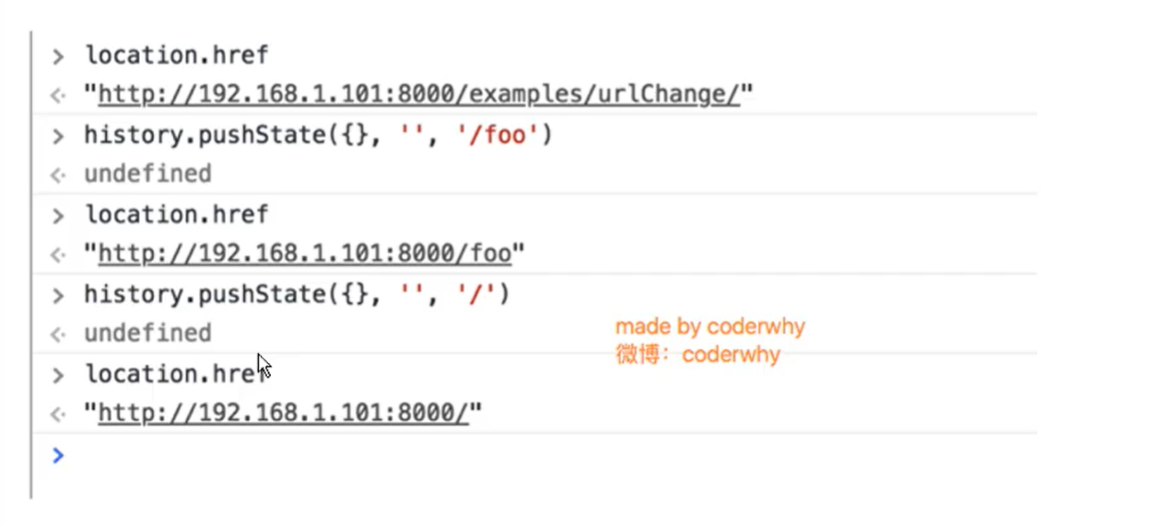
HTML5的history模式: pushState
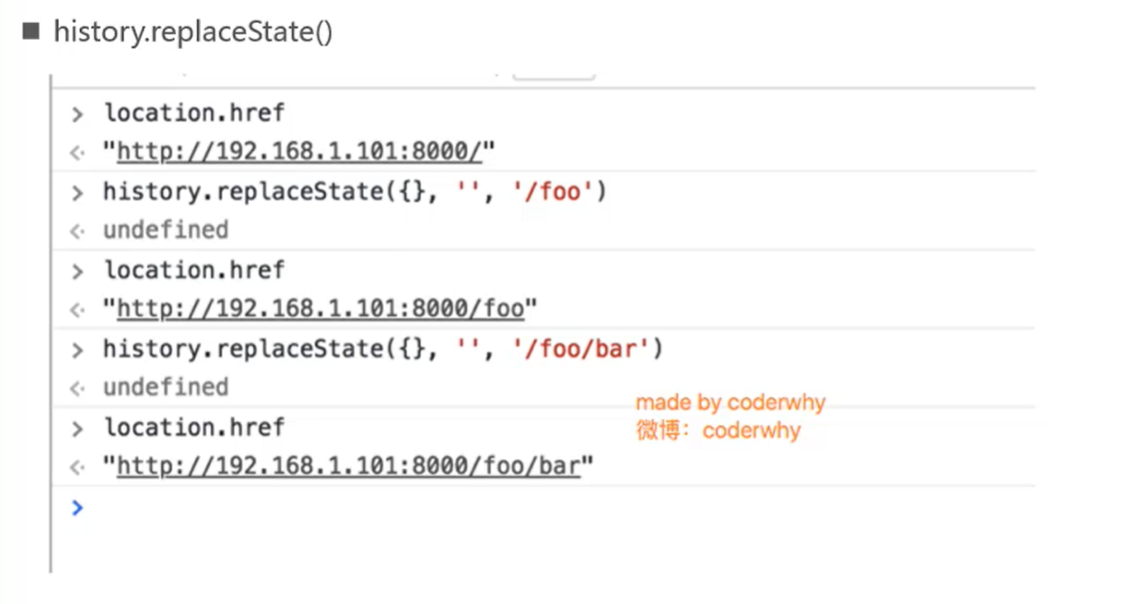
HTML5的history模式: replaceState
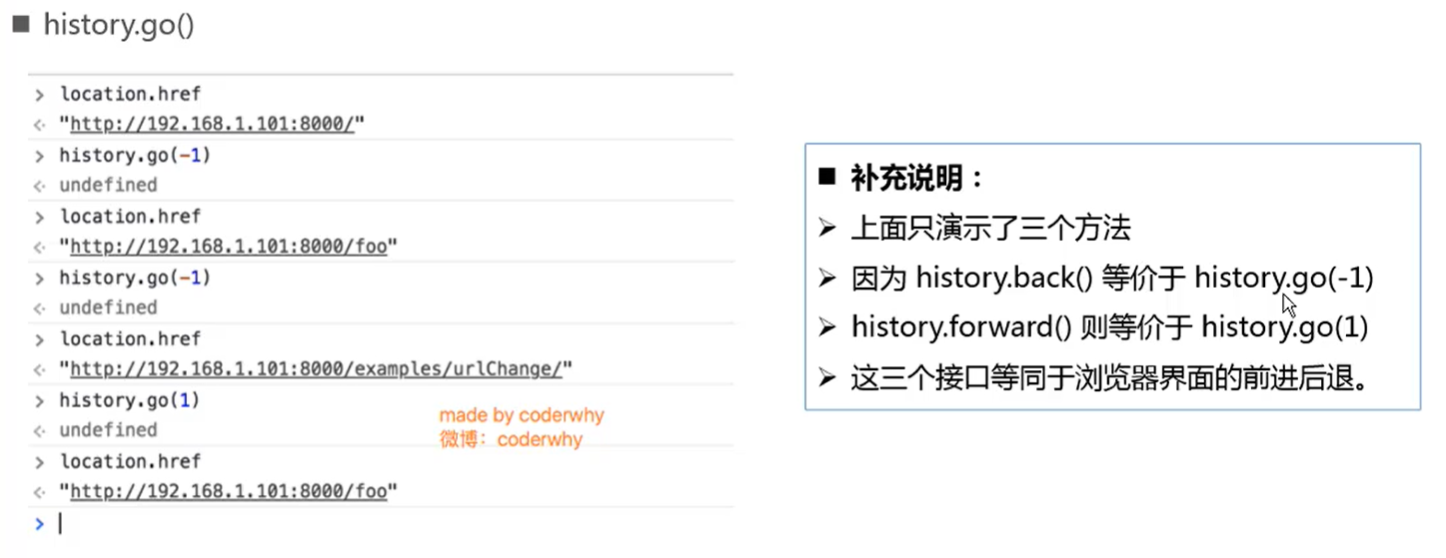
HTML5的history模式: go
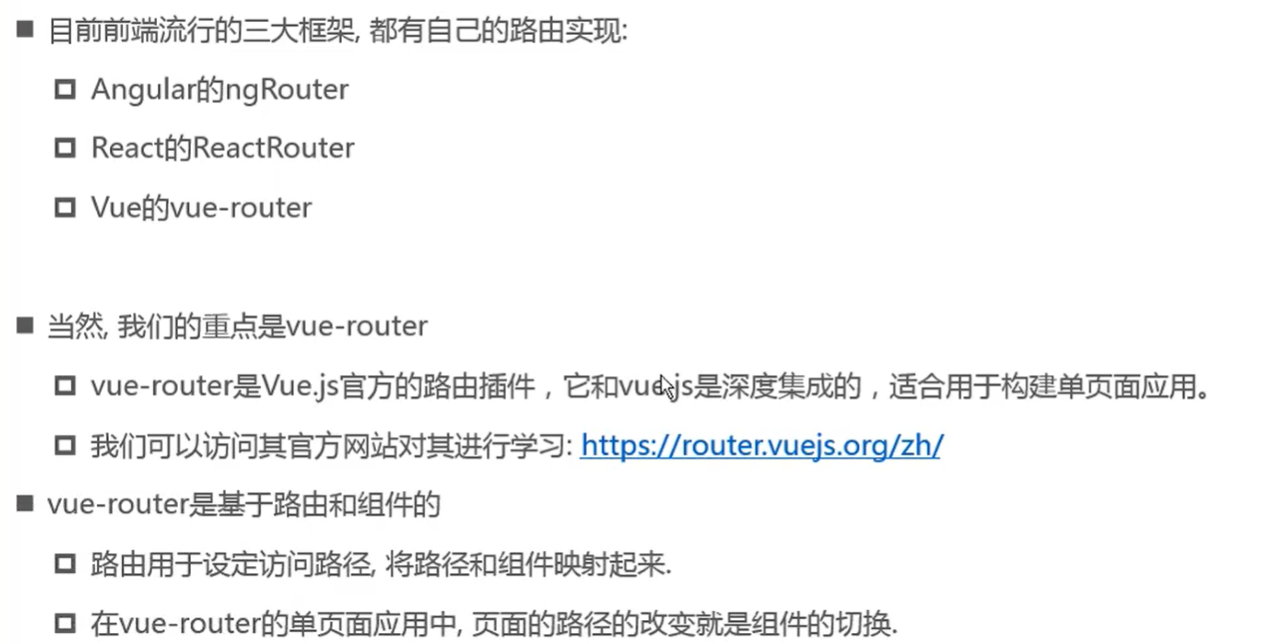
认识vue-router
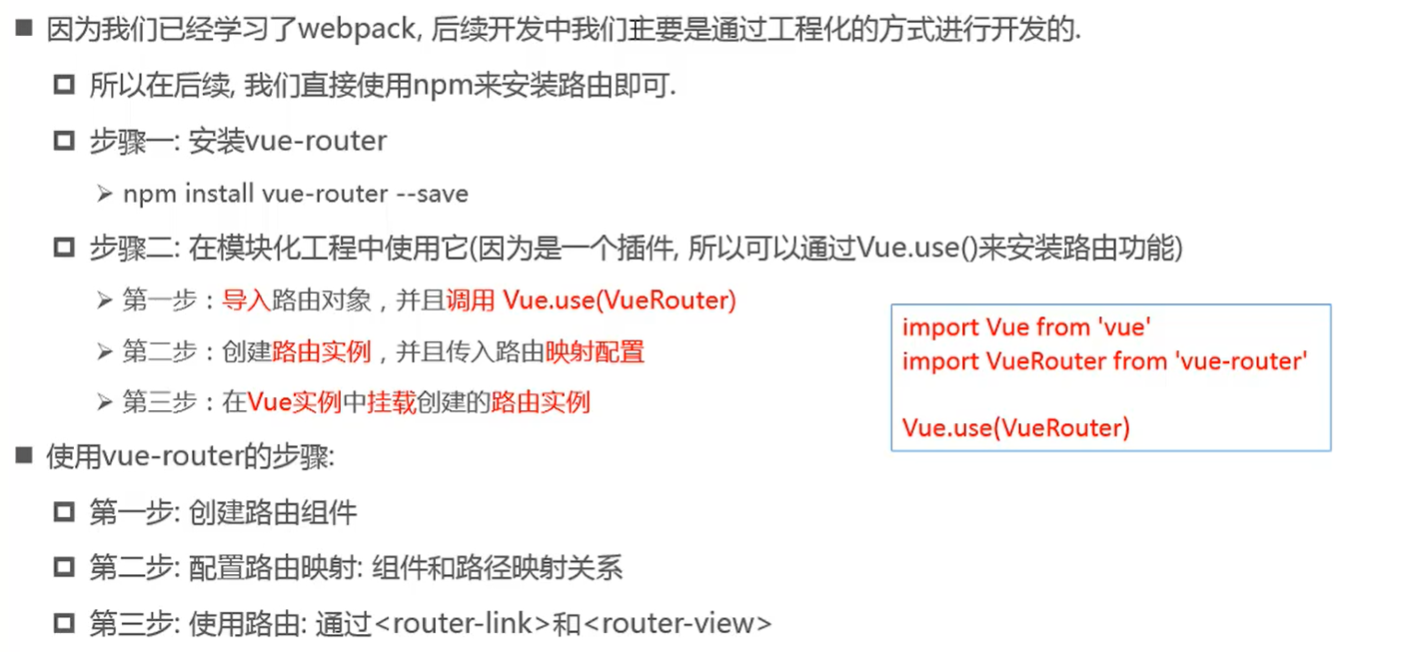
安装和使用
在初始化项目的时候可以选择安装vue-router,或者 vue ui添加
初步使用
搭建框架
main.js
1
2
3
4
5
6
7
8
9
10
11
12
13
14
| import Vue from 'vue'
import App from './App'
import router from './router'
Vue.config.productionTip = false
new Vue({
el: '#app',
router,
render: h => h(App)
})
|
项目构建完成后,打开 rouer 文件夹
index.js
1
2
3
4
5
6
7
8
9
10
11
12
13
14
15
16
17
18
19
|
import VueRouter from 'vue-router'
import Vue from 'vue'
Vue.use(VueRouter)
const routes = [
]
const router = new VueRouter({
routes
})
export default router
|
components 文件夹下创建修改文件
Home.vue
1
2
3
4
5
6
7
8
9
10
11
12
13
14
15
16
| <template>
<div>
<h2>我是首页</h2>
<p>我是首页内容</p>
</div>
</template>
<script>
export default {
name: "Home"
}
</script>
<style scoped>
</style>
|
About.vue
1
2
3
4
5
6
7
8
9
10
11
12
13
14
15
16
| <template>
<div>
<h2>我是关于</h2>
<p>我是关于内容</p>
</div>
</template>
<script>
export default {
name: "About"
}
</script>
<style scoped>
</style>
|
router 文件夹下 index.js
1
2
3
4
5
6
7
8
9
10
11
12
13
14
15
16
17
18
19
20
21
22
23
24
25
26
27
28
29
30
|
import VueRouter from 'vue-router'
import Vue from 'vue'
import Home from '../components/Home'
import About from '../components/About'
Vue.use(VueRouter)
const routes = [
{
path: '/home',
component: Home
},
{
path: '/about',
component: About
}
]
const router = new VueRouter({
routes
})
export default router
|
修改 App.vue
router-line 和 router-view
1
2
3
4
5
6
7
8
9
10
11
12
13
14
15
16
17
| <template>
<div id="app">
<router-link to="/home">首页</router-link>
<router-link to="/about">关于</router-link>
<!--占位 点击某个 router-link 的时候会将返回的数据填充到 router-view-->
<router-view></router-view>
</div>
</template>
<script>
export default {
name: 'App'
}
</script>
<style>
</style>
|
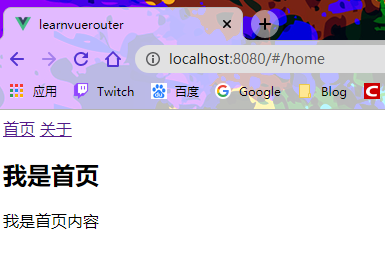
浏览器访问效果
点击哪儿,显示哪个组件的数据,并且浏览器不会刷新
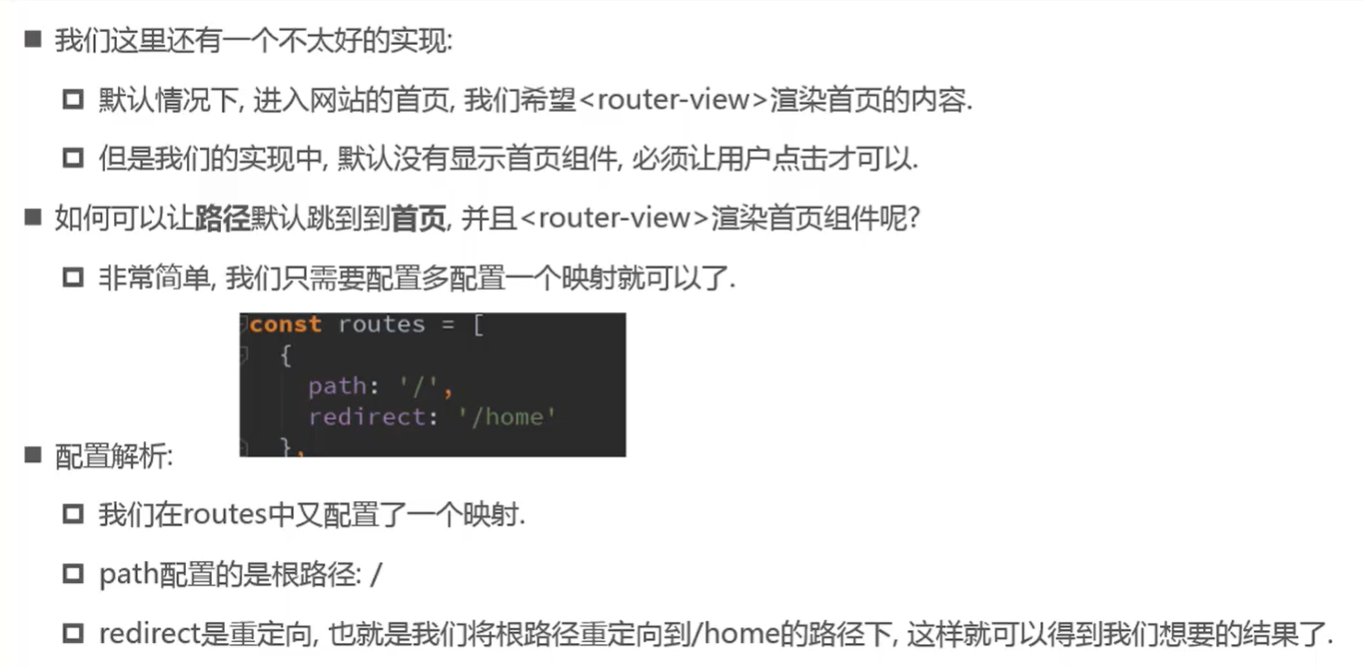
路由的默认路径
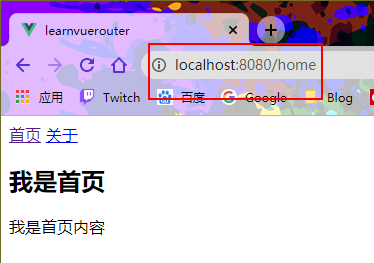
修改 history 模式
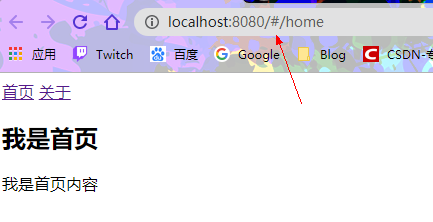
默认的路径是一个 hash 值,不好看
修改成 history 模式
index.js文件中添加
1
2
3
4
5
6
| const router = new VueRouter({
routes,
mode: 'history'
})
|
router-link 的其他属性
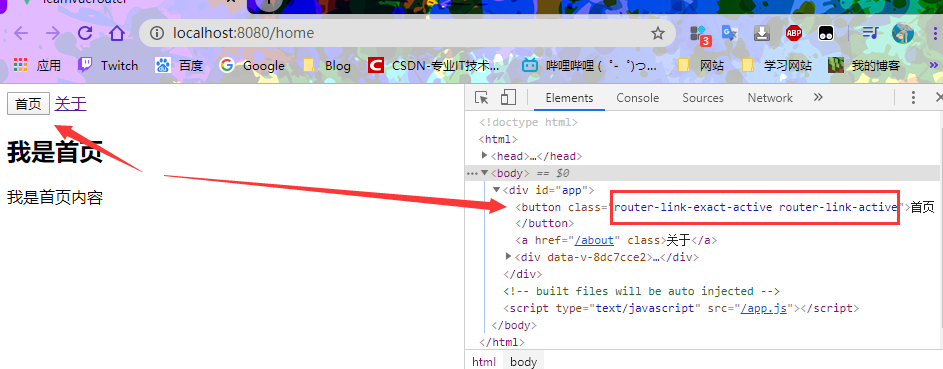
tag
router-link 默认渲染的是一个 a 标签,我们也可以自定义想要渲染的标签
1
2
| // tag 自定义渲染的标签
<router-link to="/home" tag="button">首页</router-link>
|
replace
点击一个页面后不能后退
1
| <router-link to="/home" tag="button" replace>首页</router-link>
|
active-class
比如说:当这个按钮处于活跃状态,也就是被点击的时候,会默认给这个按钮加上class,那么我们就可以根据这个class,自定义样式
App.vue
1
2
3
4
5
| <style>
.router-link-active {
color: red;
}
</style>
|
效果
自定义 class 名字 linkActiveClass
1
| <router-link to="/home" tag="button" replace active-class="active">首页</router-link>
|
简便写法
在路由里添加,index.js
1
2
3
4
5
6
7
8
| const router = new VueRouter({
routes,
mode: 'history',
linkActiveClass: 'active'
})
|
路由代码跳转
this.$router.push()
this.$router.replace()
App.vue
1
2
3
4
5
6
7
8
9
10
11
12
13
14
15
16
17
18
19
20
21
22
23
24
25
26
27
| <template>
<div id="app">
<button @click="homeClick">首页</button>
<button @click="aboutClick">关于</button>
<router-view></router-view>
</div>
</template>
<script>
export default {
name: 'App',
methods: {
homeClick() {
this.$router.replace('/home').catch(err => {err})
console.log('homeClick');
},
aboutClick() {
this.$router.replace('/about').catch(err => {err})
console.log('aboutClick');
}
}
}
</script>
|
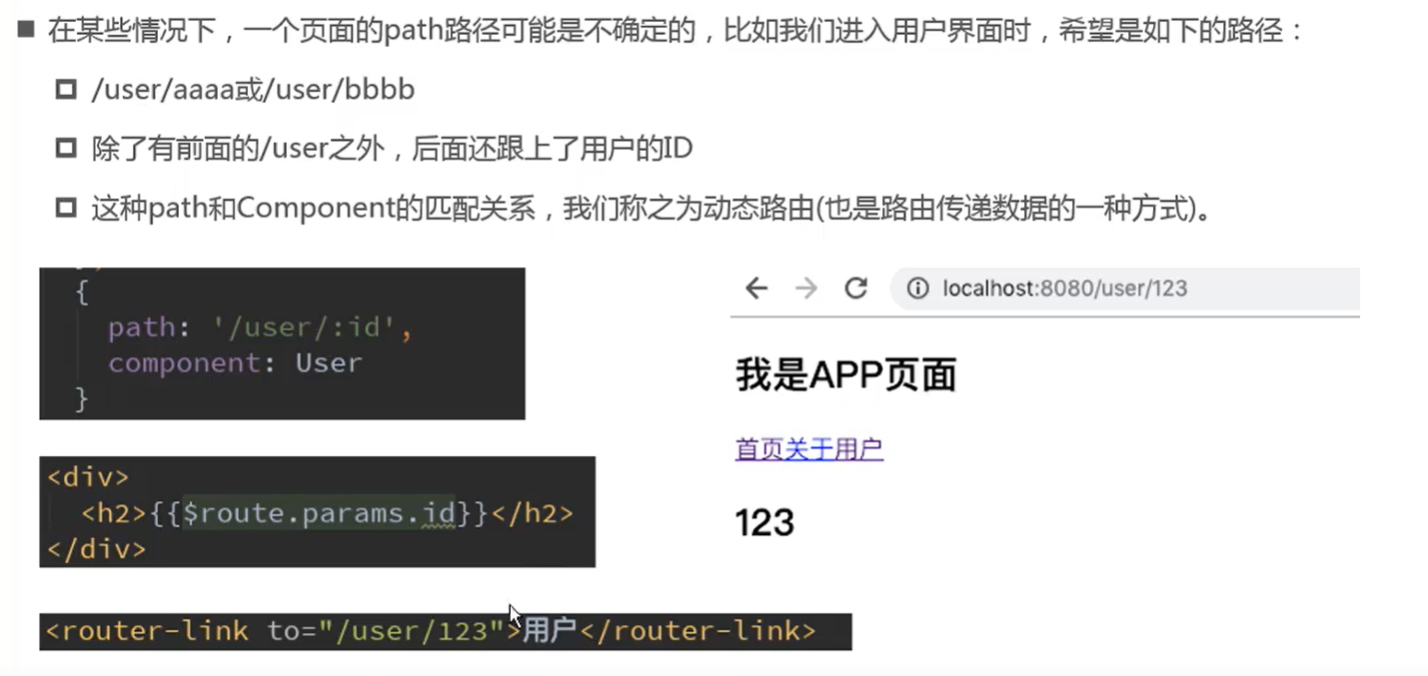
动态路由
路径中动态显示信息
创建 User.vue
1
2
3
4
5
6
7
8
9
10
11
12
13
14
15
16
| <template>
<div>
<h2>我是用户界面</h2>
<p>我是用户的相关信息</p>
</div>
</template>
<script>
export default {
name: "User"
}
</script>
<style scoped>
</style>
|
index.js 导入 User.vue
1
| import User from '../components/User'
|
添加路由映射关系
1
2
3
4
| {
path: '/user/:userId',
component: User
}
|
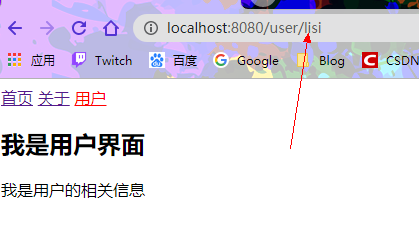
App.vue
1
2
| // 使用 v-bind 简写 : 动态绑定 userId
<router-link :to="'/user/'+userId" replace>用户</router-link>
|
1
2
3
4
5
6
7
8
9
10
| <script>
export default {
name: 'App',
data(){
return{
userId: 'lisi'
}
}
}
</script>
|
效果
页面中动态显示信息
User.vue
1
2
3
4
5
6
7
8
9
10
11
12
13
14
15
16
17
18
19
20
21
22
| <template>
<div>
<h2>我是用户界面</h2>
<p>我是用户的相关信息</p>
<h2>{{userId}}</h2>
</div>
</template>
<script>
export default {
name: "User",
computed: {
userId() {
return this.$route.params.userId
}
}
}
</script>
<style scoped>
</style>
|
或者可以
1
2
3
4
5
6
7
8
9
10
11
12
13
14
15
16
17
| <template>
<div>
<h2>我是用户界面</h2>
<p>我是用户的相关信息</p>
<h2>{{$route.params.userId}}</h2>
</div>
</template>
<script>
export default {
name: "User"
}
</script>
<style scoped>
</style>
|
效果
$router 是整个路由的实例,也就是index.js里的 const router = new VueRouter
$route 是哪个组件处于活跃状态就拿到哪个组件
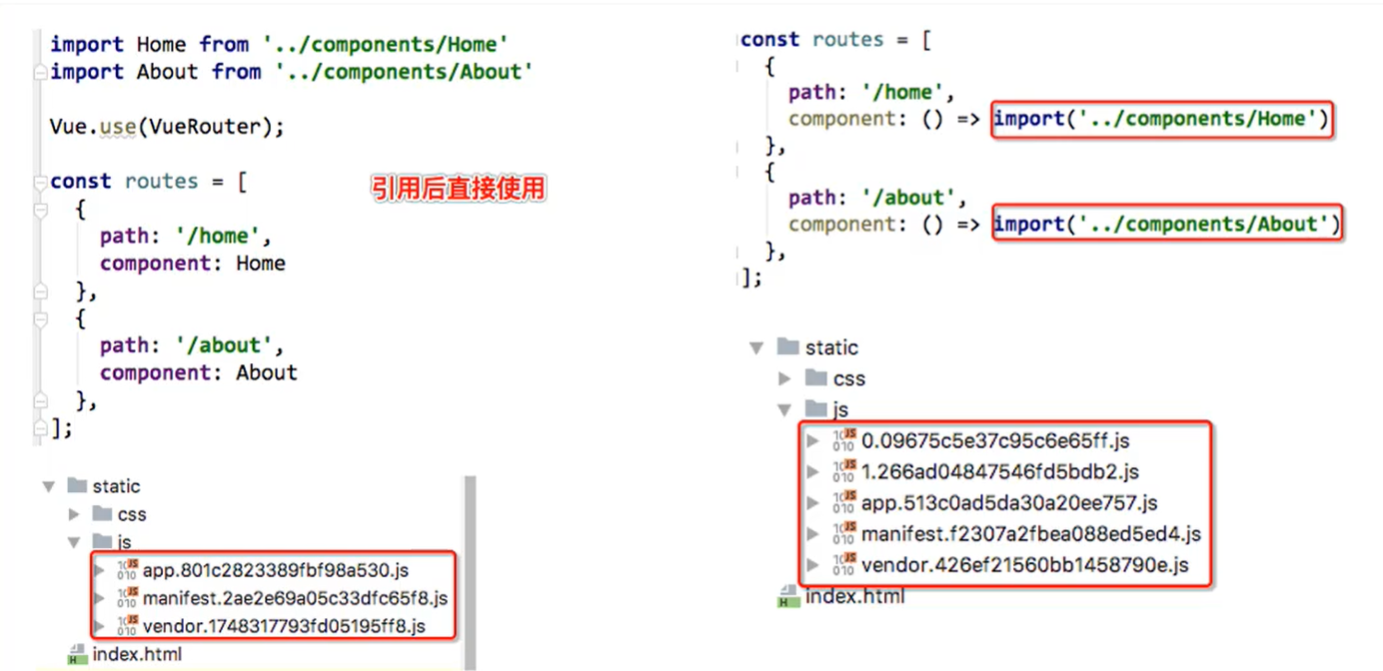
路由的懒加载
路由懒加载的效果
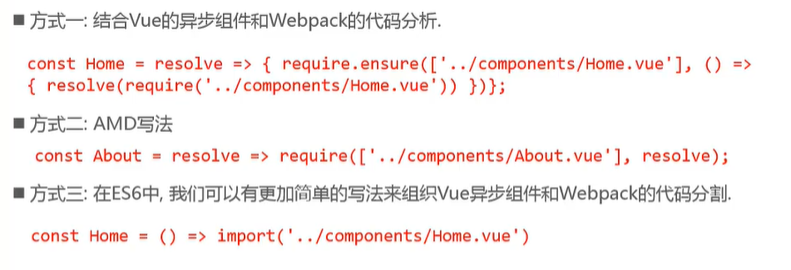
懒加载的方式
使用第三种方式
修改index.js 导入组件的方式
1
2
3
4
|
const Home = () => import('../components/Home')
const About = () => import('../components/About')
const User = () => import('../components/User')
|
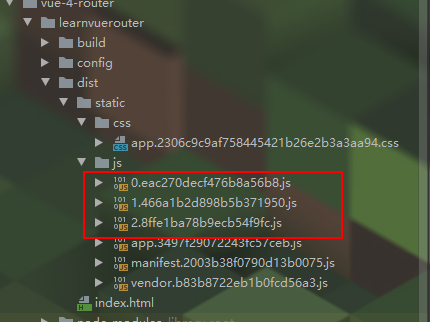
打包查看效果
一个懒加载对应一个 js 文件,用户访问的时候请求对应的js文件,减轻压力
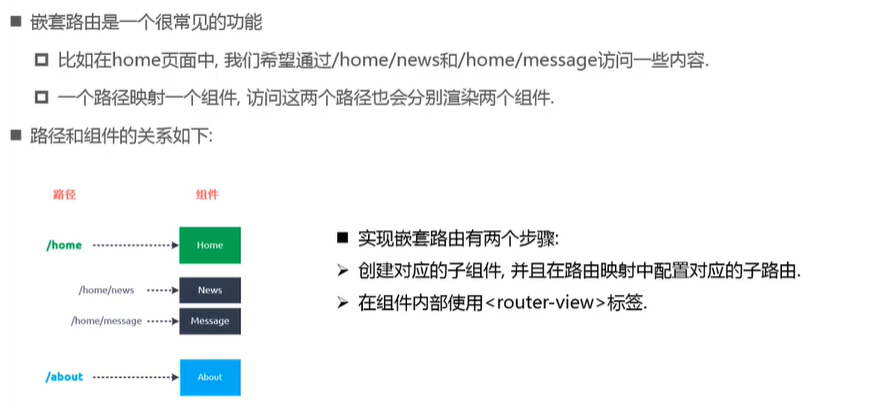
路由的嵌套使用
创建页面
创建 Home.vue 的子组件 HomeNews.vue 和 HomeMessage.vue
HomeNews.vue
1
2
3
4
5
6
7
8
9
10
11
12
13
14
15
16
17
18
19
20
| <template>
<div>
<ul>
<li>新闻1</li>
<li>新闻2</li>
<li>新闻3</li>
<li>新闻4</li>
</ul>
</div>
</template>
<script>
export default {
name: "HomeNews"
}
</script>
<style scoped>
</style>
|
HomeMessage.vue
1
2
3
4
5
6
7
8
9
10
11
12
13
14
15
16
17
18
19
20
| <template>
<div>
<ul>
<li>消息1</li>
<li>消息2</li>
<li>消息3</li>
<li>消息4</li>
</ul>
</div>
</template>
<script>
export default {
name: "HomeMessage"
}
</script>
<style scoped>
</style>
|
使用
index.js
导入
1
2
| const HomeNews = () => import('../components/HomeNews')
const HomeMessage = () => import('../components/HomeMessage')
|
嵌套进 Home
1
2
3
4
5
6
7
8
9
10
11
12
13
14
15
16
17
18
19
20
21
| const routes = [
{
path: '/home',
component: Home,
children: [
{
path: '',
redirect: 'news'
},
{
path: 'news',
component: HomeNews
},
{
path: 'message',
component: HomeMessage
}
]
}
]
|
Home.vue
1
2
3
4
5
6
7
8
9
10
11
12
13
14
15
16
17
18
19
| <template>
<div>
<h2>我是首页</h2>
<p>我是首页内容</p>
<router-link to="/home/news">新闻</router-link>
<router-link to="/home/message">消息</router-link>
<router-view></router-view>
</div>
</template>
<script>
export default {
name: "Home"
}
</script>
<style scoped>
</style>
|
效果
路由的参数传递
方式1:params
点击前往
方式2:query
创建 Profile.vue
1
2
3
4
5
6
7
8
9
10
11
12
13
14
15
| <template>
<div>
<h2>我是Profile组件</h2>
</div>
</template>
<script>
export default {
name: "Profile"
}
</script>
<style scoped>
</style>
|
index.js添加路由映射
1
2
3
4
| {
path: '/profile',
component: Profile
}
|
使用 query 的方式传参
App.vue
1
| <router-link :to="{path: '/profile',query: {name: 'duxiu',age: 18,height: 188}}" replace>档案</router-link>
|
Profile.vue 接收
1
2
3
4
5
6
7
8
9
10
11
12
13
14
15
16
17
18
19
| <template>
<div>
<h2>我是Profile组件</h2>
<h2>{{$route.query}}</h2>
<h2>{{$route.query.name}}</h2>
<h2>{{$route.query.age}}</h2>
<h2>{{$route.query.height}}</h2>
</div>
</template>
<script>
export default {
name: "Profile"
}
</script>
<style scoped>
</style>
|
效果
如果不是用 router-link 来传递参数,应该怎么做?
App.vue
1
| <button @click="profileClick">档案</button>
|
1
2
3
4
5
6
7
8
9
10
11
12
13
14
15
16
17
18
19
20
21
22
| <script>
export default {
name: 'App',
data(){
return{
userId: 'lisi'
}
},
methods: {
profileClick(){
this.$router.push({
path: '/profile',
query: {
name: 'aaa',
age: 20,
height: 188
}
}).catch(err => {err})
}
}
}
</script>
|
效果是一样的
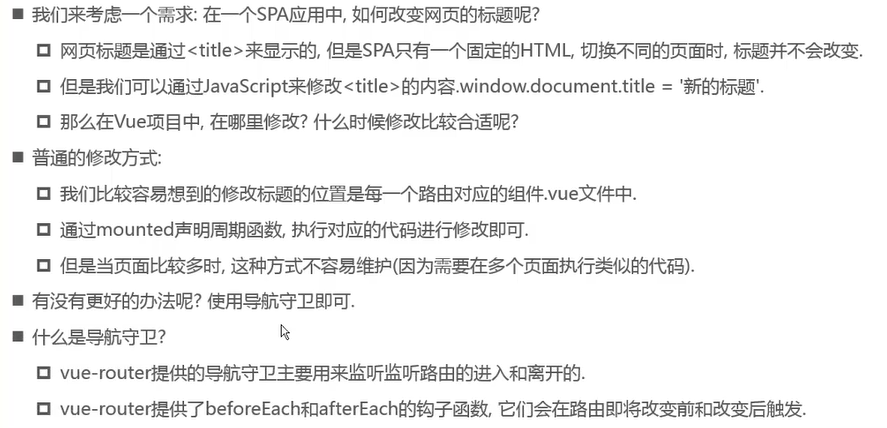
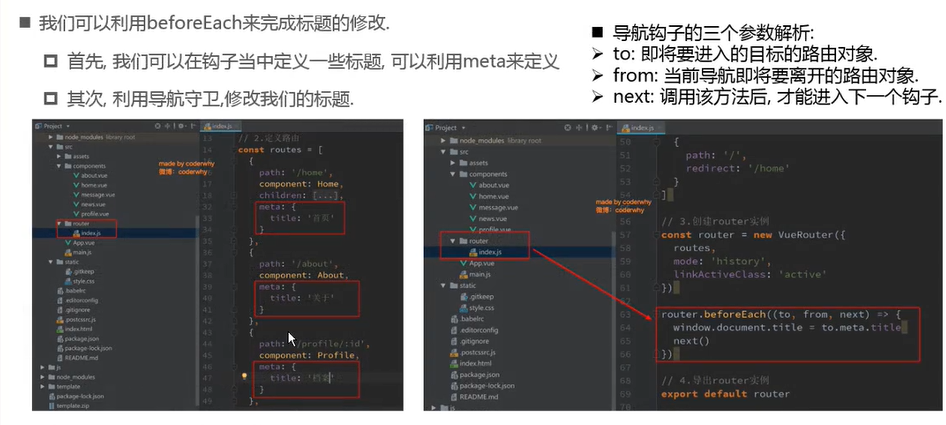
导航守卫
为什么使用?
beforeEach
App.vue routes数组中添加 meta 元数据
1
2
3
4
5
6
7
8
9
10
11
12
13
14
15
16
| const routes = [
{
// 默认值
path: '',
// 重定向
redirect: '/home'
},
{
path: '/home',
component: Home,
// 元数据
meta: {
title: '首页'
}
}
]
|
router 实例同级添加如下代码
1
2
3
4
5
6
| // 前置钩子(hook)
router.beforeEach((to, from, next) => {
// 从from跳转到to,获得到活跃组件的元数据中的title
document.title = to.matched[0].meta.title
next()
})
|
效果
afterEach
后置钩子
1
2
3
4
| // 后置钩子
router.afterEach((to, from) => {
console.log('-----------------------------')
})
|
上述的是全局守卫,除了全局还有组件守卫,路由独享守卫
官网https://router.vuejs.org/zh/guide/advanced/navigation-guards.html#%E8%B7%AF%E7%94%B1%E7%8B%AC%E4%BA%AB%E7%9A%84%E5%AE%88%E5%8D%AB
keep-alive 遇见 vue-router
组件不会被频繁的创建和修改
没有使用 keep-alive
Home.vue export default{} 添加 函数
1
2
3
4
5
6
7
8
| // 创建时
created() {
console.log('Home created');
},
// 销毁时
destroyed() {
console.log('Home destroyed');
}
|
效果
使用 keep-alive
App.vue 添加
1
2
3
4
| // 在 <router-view></router-view> 外面包一层 keep-lived
<keep-alive>
<router-view></router-view>
</keep-alive>
|
效果
通过 keep-alive 实现导航记录
index.js
把 home 的 news 默认路径注释掉
1
2
3
4
5
6
7
8
9
10
11
12
13
14
15
16
17
18
19
20
21
22
23
| {
path: '/home',
component: Home,
meta: {
title: '首页'
},
children: [
{
path: 'news',
component: HomeNews
},
{
path: 'message',
component: HomeMessage
}
]
}
|
App.vue
1
2
3
4
5
6
7
8
| <template>
<!--占位 点击某个 router-link 的时候会将返回的数据填充到 router-view-->
<keep-alive>
<router-view></router-view>
</keep-alive>
</div>
</template>
|
Home.vue
1
2
3
4
5
6
7
8
9
10
11
12
13
14
15
16
17
18
19
20
21
22
23
24
25
26
27
28
29
30
31
32
33
34
| <template>
<div>
<h2>我是首页</h2>
<p>我是首页内容</p>
<router-link to="/home/news">新闻</router-link>
<router-link to="/home/message">消息</router-link>
<router-view></router-view>
</div>
</template>
<script>
export default {
name: "Home",
data(){
return {
path: '/home/news'
}
},
// 活跃时调用
// 使用了 keep-lived 保存了状态时才有效
activated() {
this.$router.push(this.path)
},
// 上一次离开之前
beforeRouteLeave(to,from,next){
this.path = this.$route.path;
next()
}
}
</script>
<style scoped>
</style>
|
效果
keep-lived 其他属性
include
字符串或正则表达,只有匹配的组件会被缓存
1
2
3
4
5
6
7
| <keep-alive include="Profile">
<router-view></router-view>
</keep-alive>
<keep-alive include="Profile,Home">
<router-view></router-view>
</keep-alive>
|
exclude
字符串或正则表达,任何匹配的组件都不会被缓存
路径别名
Vue Cli 2.x 中可以在配置文件中配置路径别名
build文件夹下 webpack.base.conf.js
1
2
3
4
5
6
7
8
9
10
| resolve: {
extensions: ['.js', '.vue', '.json'],
alias: {
'@': resolve('src'),
'assets': resolve('src/assets'),
'components': resolve('src/components'),
'views': resolve('src/views')
}
}
|
注意:
使用路径别名的时候,需要注意
不是 import 导入路径时,例如 src 需要加上 ~ 号
1
| <img src="~assets/img/tabbar/profile.svg" alt="" slot="item-icon">
|
import 导入路径时不需要
1
| import TabBarItem from "components/tabbar/TabBarItem";
|